We remain fully operational. Our teams are working around the clock to ensure your deliveries continue safely.

Descargar la aplicación


Servicios al cliente
Sobre nosotros
Copyright © 2025 Desertcart Holdings Limited
Descargar la aplicación


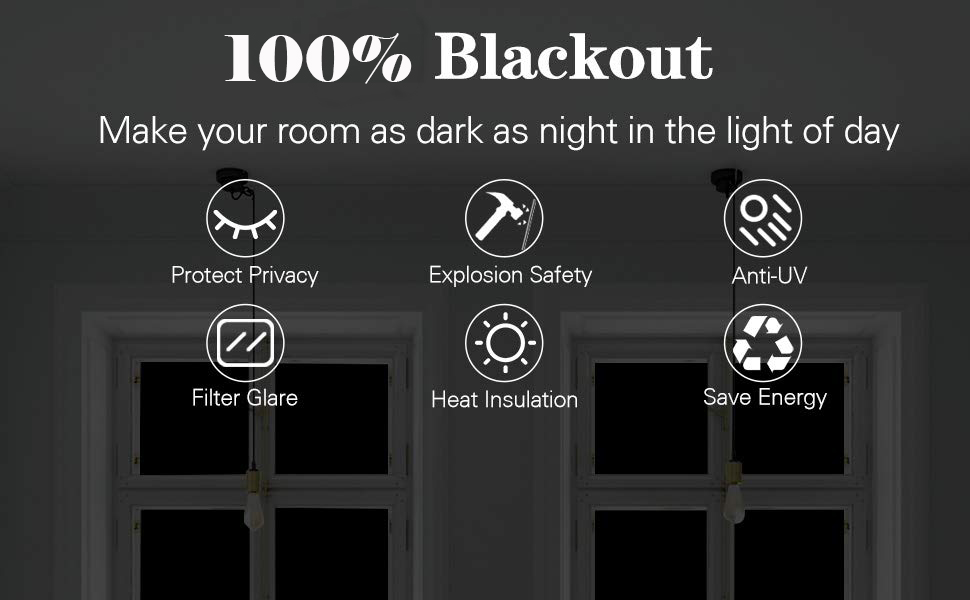
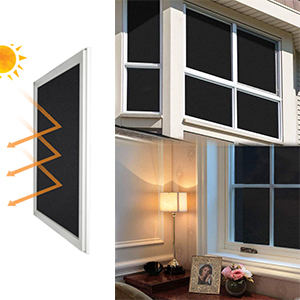
🌑 Turn your space into a blackout sanctuary—privacy and comfort, no compromises!
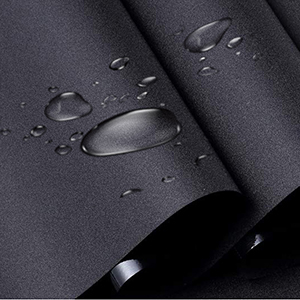
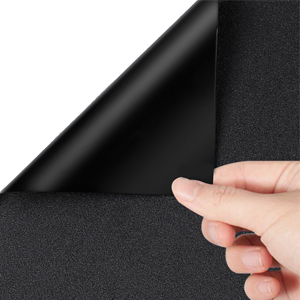
WochiTV Total Blackout Window Film is a 100% light-blocking, non-adhesive static cling film designed for ultimate privacy and energy efficiency. Made from durable PVC + PET, it installs easily without residue, offers 99% UV protection, and enhances safety with explosion-proof, waterproof features—perfect for bedrooms, nurseries, and any space craving darkness and discretion.


G**N
Good value and easy to install for basic sound control”
The product works well for reducing echo and background noise. It’s lightweight, easy to install, and sticks well to the wall. I noticed a clear difference in sound quality when recording.The only reason I’m giving it 4 stars instead of 5 is because the material feels a bit thinner than I expected—but for the price, it does the job. Great option for home studios or small rooms.
M**Y
Works well for limiting temperature rise in a garage.
I don't think the "privacy" aspect of this film is very useful. The only time it works is during the day, when outside is much brighter than inside, and under those conditions you can't see inside a house anyway (try it!)BUT that doesn't mean it's useless; it's second function, cutting out IR and UV, works really well.If you live in a sunny state you probably know that if your garage has glass windows, then it turns into a furnace during the day, with the greenhouse effect ensuring that it can get 10 to 15 degrees hotter than outside. My experience is that with this film applied to the garage windows it only gets the same temperature as outside.So, OK, it can't work magic -- but keeping the garage 10 to 15 degrees cooler than it would otherwise be ain't nothing! For a mere twenty dollars or so, that is, IMHO money well spent!Some hints for easy application:Get film slightly wider than your window panes.Make sure you have all the tools necessary and right on hand (a squeeze bottle of water, a squeegee, a credit card, a boxcutter).Don't try to cut the film to the right size with scissors; rather get it up onto the window (if necessary tape up a corner or two where the edge part extends past the window pane). Squeegee flat, then flatten the last few bumps with the credit card.Then cut off the excess by going around the window pane edge with the boxcutter. Make sure your boxcutter blade is new and sharp -- an old blade WILL skip and not cut the film nicely.With a box cutter it's fairly easy to trim the edges and create a job that looks reasonably good! My first attempt I tried using scissors to cut the film to the window size and that worked much less well.
P**J
Provides Excellent Daytime Privacy
The media could not be loaded. I got the silver in 5 rolls. I noticed on 2 of the rolls, they had an indentation, almost like a small cut but still usable. Easy to install once you get the hang of it. You need:TO CLEAN WINDOWS:- Windex- Scotch-Brite Non-Scratch Scrub Sponges- Shower Squeegee- Scraper with Double Edged Blade (optional)TO INSTALL- FOSHIO 1PCS Green Squeegee Scraper Shower- Spray bottle- Johnson's baby shampoo (JBS)- cutter- Metallic Ruler (optional)Make sure you clean the window properly. To wet the window and the tint, mix water and JBS. Just a very small amount of JBS where you would have very minimal bubbling. Too much will make it slippery and will be harder to install.I think one of the reason why some complain that they can't remove the bubbles is because of using the wrong tool and technique. Get a squeegee with a handle (see my recommendation) because with it, you get more leverage to squeeze out the moisture when installing. You should also wet the film from outside when using the squeegee because it helps the tool slide better.The tint material is thick. You can put a lot of pressure on the squeegee to squeeze the moisture out which is good if this is DIY project. Once installed, you might see some very small bubbles (like a dot) here and there. After a few days, they disappear.From a far, the tint looks great. If you inspect very closely and at a certain angle, you would see some sort of a streak or pattern on the tint (see pix on what you can see from the other side, some distortion). So it is not like a mirror finish. I would rate the quality 3 out 5. I guess at this price point, I can't complain. I gave it a 4 rating overall.20200711 Video Added:Using squeegee to remove water between tint and glass. One I’m using I highly recommend.
B**Y
Enough for entire sliding glass door
Ordered the blue tint for our sliding glass doors. There is enough to cover both sides with an inch or two excess on all sides. Installation was tricky and is best done with 2 persons. The hardest part was cutting to dimensions as you need a large flat surface and the protective plastic film on the reflective side is thick and wants to re-roll. (Ruler markings on the protective plastic side would have been helpful).The reflective side goes on the glass. We had to spray the glass with water, place the film in position while pulling off the protective film all at the same time. (Be liberal with the water). Use a wet squeegee or rag for bubbles. (Don't sweat the tiny bubbles!) The film can be removed anytime with no damage to the glass.The film adheres well, even at the corners. The blue tint has a cooling effect indoors. The reflective side provides privacy, protection against indirect radiant energy, and reduces glare. We love this product and the effort to install it was worth it.
Trustpilot
Hace 1 día
Hace 4 días