


Buy anything from 5,000+ international stores. One checkout price. No surprise fees. Join 2M+ shoppers on Desertcart.
Desertcart purchases this item on your behalf and handles shipping, customs, and support to Uruguay.
✨ Transform your walls, transform your vibe! ✨
Art3d’s 10-sheet self-adhesive vinyl backsplash tiles measure 12" x 12" each, featuring a waterproof, thickened gel top for a realistic 3D marble look. Designed for easy peel-and-stick application on multiple wall types, these durable tiles offer strong adhesion ideal for kitchens, showers, and fireplaces—no grout or tools needed. Perfect for millennials seeking a stylish, hassle-free home upgrade that blends luxury with practicality.


| ASIN | B07NJFP2RK |
| Additional Features | Self-adhesive,Strong |
| Best Sellers Rank | #8,228 in Tools & Home Improvement ( See Top 100 in Tools & Home Improvement ) #20 in Wall Stickers & Murals |
| Brand | Art3d |
| Brand Name | Art3d |
| Color | Gray |
| Coverage | 1.00 Square Feet |
| Customer Reviews | 4.4 out of 5 stars 15,098 Reviews |
| Edge Type | Square Edge |
| Finish Type | Finished |
| Finish Types | Finished |
| Form Factor | Rectangular with square edge |
| Global Trade Identification Number | 06975129500714 |
| Included Components | 10 Sheets Self-Adhesive Backsplash Tiles |
| Installation Method | Peel and Stick |
| Item Dimensions L x W | 12"L x 12"W |
| Item Display Dimensions | 11.81 x 11.81 inches |
| Item Type Name | Marble Tiles |
| Item Weight | 0.9 Kilograms |
| Manufacturer | Art3d |
| Manufacturer Part Number | A17009P10def |
| Material | Polyvinyl Chloride (PVC) |
| Material Type | Polyvinyl Chloride (PVC) |
| Model Number | A17009P10 |
| Pattern | Checkered |
| Recommended Uses For Product | Wide range of residential and commercial interior and exterior wall decoration applications, including living rooms, bedrooms, lobbies, offices, shopping malls, TV walls, headboards, staircases, kids' rooms, and spaces like restaurants, clinics, and boutiques. |
| Shape | Rectangular |
| Size | 30*30cm,10sheets |
| Style | Marble look |
| Style Name | Marble look |
| Unit Count | 10.0 Square Feet |
| Water Resistance Level | Waterproof |
M**S
The best
It looks incredible, easy to install, great quality, transformation in minutes, easy to clean and durable.
S**Y
In need of a facelift? It’s here!
First and foremost. *I* didn’t make my kitchen look absolutely horrible, it was like this when I moved in. I’ve always hated looking at it and simply couldn’t take it anymore. I scoured Amazon for something I thought I’d actually enjoy looking at everyday. After looking at many options, I settled on this. I took them seriously when it said not to use this product on textured walls, which I have, so I did use compound and skim the walls smooth and paint first, which didn’t take a lot of time, actually. I then took a look at what kind of cuts I’d have to make and decided where to start in order to make things flow and made cuts to accommodate the outlets, switches, and above stove area. I started on the right and worked my way left. I did a fast wipe down of the wall with isopropyl alcohol and let it air dry for a couple of minutes and then warmed up both the wall and the back of the tile with a hairdryer on medium speed and heat. I did it just long enough to feel the tile relax and did the adhesive to warm up and get tacky. I carefully placed the tiles repeating the process over and over until I reached the corner. The tiles were easy to peel and so far the overall performance of them is great. I still have the other wall and the other side of the counter to complete, but it’s already made my kitchen a much more pleasant place to be. The colors really brighten things up and appear to really stick to the wall well. The ease of use was awesome. The quality is great and they really pop. I may add a final photo when I finally get the time to finish but I really love it and would recommend it to anyone wanting to give their space a good looking and colorful facelift. Cheers to getting rid of other people’s bad ideas with something that really looks fabulous. The photos don’t do it justice, but I’m waiting on the new lights.
C**N
Great Budget-Friendly Option
The color was exactly what I ordered. My advice is to cut to size if it is just slightly too long. If you try to overlap them too much, that is when it starts to look like it is peeling from the wall. The areas where I followed the instructions, it's perfect and I've had it on my walls now for 2 months. It is pretty easy to apply once I followed instructions and it sticks to the kitchen wall very well. Overall, it looks great and if you are on a budget and/or are renting a place, it is perfect :)
M**S
Not exactly 12"x12" - but beautiful and effective!
I live in an apartment, so when I finally decided that I wanted to do a backsplash in my kitchen, peel and stick tiles were the only thing I was going to choose. These have been in my wish list for a super long time and I am genuinely thrilled with this purchase. The only reason I didn't leave five stars is because the tiles are not exactly 12 in by 12 in, which threw off my measurements, but ended up being something I was able to work around because of how easy these are to cut. That also gave me an opportunity to see how their customer service works, which was amazing: I reached out to the company and let them know that I was short a few tiles because of the measurements being incorrect (one of the two boxes I ordered was also missing a single tile, so only had nine) and they sent me an additional box of 10 tiles promptly and free of charge. Very happy with the customer service! The peel and stick tiles you find on Amazon are typically a huge gamble for whether they're going to work properly, stick properly, last a long time, etc. But these tiles are genuinely really great quality. And I'm super impressed! The adhesive is really effective, even on my walls which are not perfectly flat - they have that bit of texture that's common in apartments in the US, which you can see in the closer photo I have with the outlet in it. If I run my hand along the tile when it's stuck to the wall, I can feel that the adhesive isn't stuck to the wall in every single spot on the back, but that doesn't make a difference in how well it sticks to the wall all around, especially on the edges and corners! I am really astonished how well these tiles stick on the edges and corners, which is why I am so happy with these even with the issues I faced with measurements and a tile missing from one of the boxes. The color is really stunning and matches. What's in the listing. It also has a really nice gloss that looks like real tile. I love how simple these are to fit together with the guides for where to overlap the tiles. It was super easy to put these up in a relatively short amount of time - the entire backsplash you see in my photos was something I was able to do in maybe about 4 hours, and that included redoing some of my measurements, cutting tiles to fit, unsticking and re-sticking some of them in places where I didn't get the angle quite right, and taking a ton of photos (lol). This is a pretty speedy project compared to the other things I've done! Overall, these are an amazing bang for your buck given the massive impact they make, the ease of installation, and their great functionality to protect the kitchen walls from things like oils. They're really easy to clean, they look beautiful, they stick really well (including on corners and edges), and customer service is great. For the functionality paired with all of that, these are a solid 9.5/10 - just make sure you order more than you need, then measure them when you get them, and THEN do your full measurements. :)
E**O
Easy to Install, Great Adhesion, Good Looking
I added this peel and stick faux tile to our motorhome's bathroom vanity and it turned out great. I put the first panel on and I failed to set it square, so I tried to remove it. Boy oh boy, the adhesive is nearly permanent and very difficult to remove! That's exactly what I was hoping for...good looking, good adhesion and easy to install. 5-stars
B**T
Was easier than I expected and looks amazing
This brought new life to my super boring kitchen! This was much easier than I thought and was really worried about taking on this project but I'm glad I did. Here is what I did. Preparation was sanding the painted wall smooth and remove the old nasty sealant from the top of my counter-top. Used a power sander and the ALLWAY TOOL CT31 3 in 1 for caulk removal and smoothing of new caulk once applied (after the back splash was put up). This took a while to get that nasty gummy old sealant up. Once finished sanding I cleaned up my mess and wiped down the walls with light soap and water towel ensuring all the dust particles were up. Once completely dry, I used a cheap little black and decker laser level to make sure my line was straight. This didn't help me much since my counter top wasn't exactly level but it did provide me with a guide. I still measure out a few random points and marked them with a pencil to ease my OCD. Using an large Amazon box cut open and spread across the floor with trash bags around it I got my first 12x12 back-splash tile and removed the backing. Holding it low and close to the old Amazon box I sprayed it with 3M adhesive spray (recommended from the included instructions). This might be a no brainer but I'll throw it out there cause I did it.....I cut the staggered ends off one tile (the first tile) and place that one on the wall cause the next tile you place will overlap the first one. I just put the first tile on the wall and didn't consider the placement of the next. Staggered end will overlap the previous tile. Continued to place tiles against the wall one after another doing my best to keep them level. Don't worry if you get a bit off level, a slight offset isn't very noticeable and is correctable with the next tile. I started at the top staggered edge and worked left to right using my hands to ensure it was firmly up against the wall and overlapping the previous tile. Cutting around light switches and electrical outlets was not that hard. Before I peeled the waxy back off revealing the adhesive, I would line it up on the wall to check where the light switch/outlet was and using an exact-o knife I cut a small square out. I cut small each time because I figured it would be better to keep cutting a little more than cutting to much and my patience payed off. I did my best to just cut around the metal enclosure box that houses the outlet or switch. Once it laid flat against the wall, I peeled, sprayed, put it on the wall and put the outlet cover back up. That is pretty much it. I took a lot of breaks; found this at times to be a bit nerve racking. Working under my cabinets with poor lighting trying my best to be as accurate as possible. Rounding a corner was easier than I thought as well. Just keep pressing all the way up to the corner and then press it into the corner. Lastly I added my sealant to the top of the counter top, let it dry, cleaned up my mess, wiped my back splash down with a damp towel for a last minute check for bubbles. Took me over three hours from start to finish.
E**N
LOVE LOVE LOVE
Got these to spruce up the kitchen in our apartment and they are FANTASTIC! Once you get the hang of them its easy application. My landlord was so impressed with them he mentioned putting them in other units in the future. Color is a deep emerald and they look like real tile due to the texture.
A**S
Disappointed
Not very pleased with this product at all. I bought 6 packs of this to do my entire kitchen. Products sounded great and easy. Once we got it up, within a week it started to peel all over the place. It is still to this day peeling all over the place. I am going to have to take it all down and replace it with something else and pray there is no damage to my walls. Very disappointed.
J**N
Fabulous look!
Easy to use and changed our kitchen look in a great way. looks very expensive!
L**O
queda precioso y muy realista
Son facilísimas de colocar. Se adhieren perfectamente con un pegamento muy fuerte. El efecto, al ser 3D, no un papel plano, queda súper realista y el efecto es ideal. Lo recomiendo totalmente.
D**N
Looks great
Used for a kitchen backsplash looks great. It is a bit of a challenge as they are very sticky but easy to reposition on the wall.
D**M
Très bien
Très bien et assez facile à poser
T**Y
Effective, looks good and designed for those that don't want to tile.....
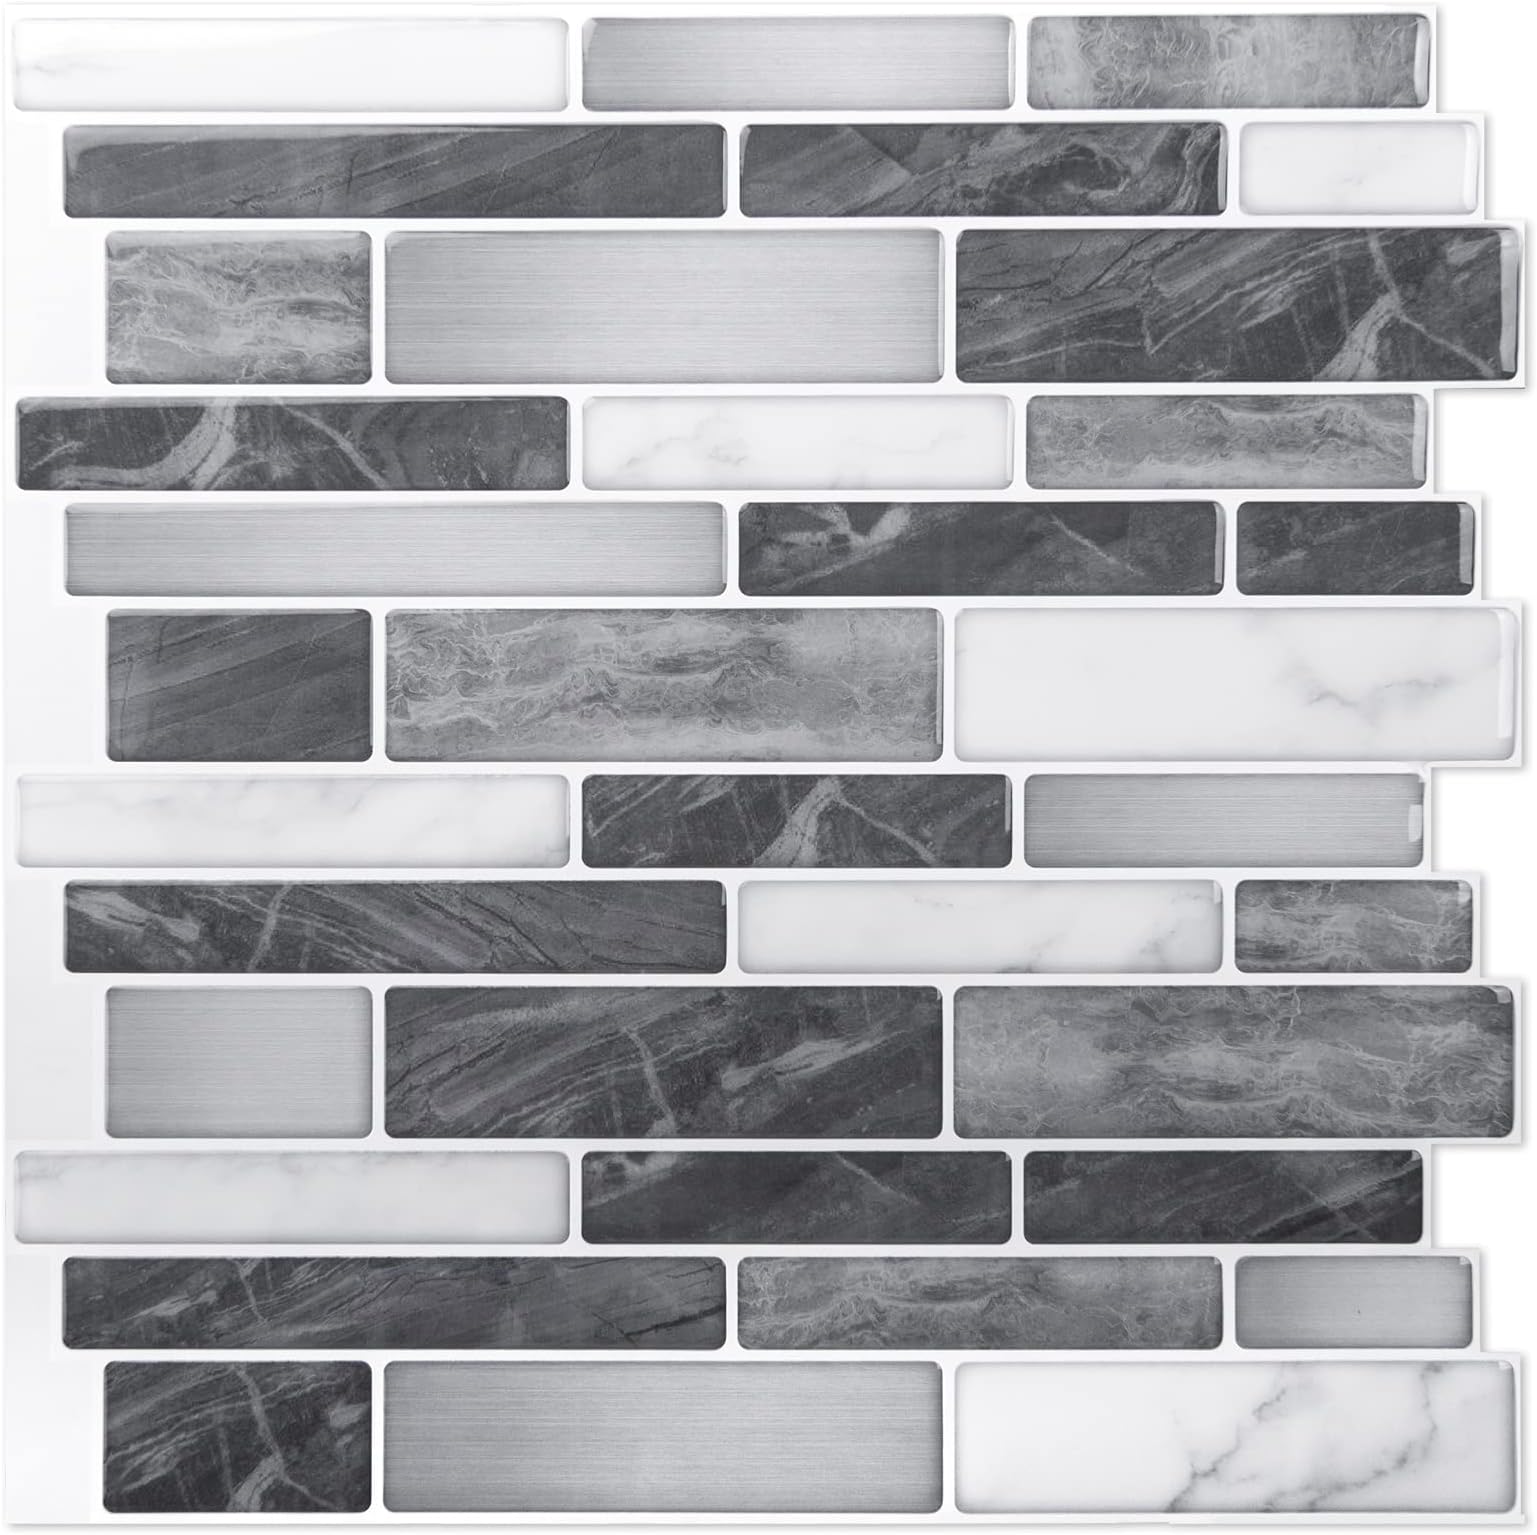
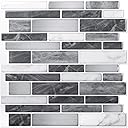
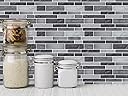
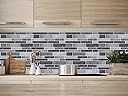
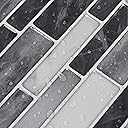
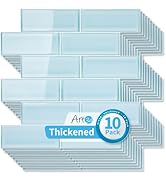
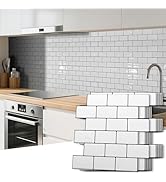
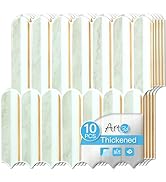
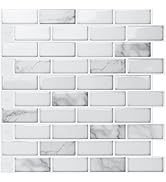
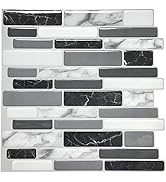
There are a lot of reviews on here, many with some useful info on whether these will be right for you. The sales description is very accurate, so I will just concentrate on what I found with these tiles.... I bought the marbly effect with darker tiles in them. Things note worthy: The darker ones are not black, they are a medium/dark grey, as well as lighter shades. The surface needs to be flawlessly clean or expect problems in the coming hours, days or weeks. I had multiple surface to adhere to, and whilst these will instantly grab any surface, they can peel or bubble if the surface is not properly prepared. I used an IPA spray (alcohol) as it removes greasy marks. If you have a good surface - these stick like sh.... They are hard to cut.... not in the sense that you need a power saw to cut through them, but you will need a good Stanley knife blade (or several depending on quantity of tiles needed). You can slice through the grout effect areas like butter, but the raised tiles areas will take 2-6 pass throughs to cut effectively, depending on how hard you press. Don't be a hero, use firm but not arm shaking force to score them for a better finish. TIPS - use new blades for a perfectly clean cut. You can use scissors as well, but a knife blade gives a more accurate, clean cut on intricate areas. I have seen photos of people using these as backsplashes on a hob.....You are idio...... These are made from vinyl and is therefore a fire hazard. Don't lay these behind a hob! I bought various designs of these things from various companies before deciding on these.... I wanted a matt effect, but most were a gloss finish. These are a gloss finish, and in a way I now prefer that as they are easier to clean. There are loads of ads with photos that give an appearance of a matt finish, but they are not - just enticingly good photography - not that I'm a cynic! Corners - So I had inward and outward corners to contend with and tried all methods. By far the simplest is to cut into a corner. If you are not using something like PVC angle or other decorative 'disguises', then it can be a little tricky if your walls are not true. My walls were compulsive liars! They were out in every possible direction making 'cut in' corners difficult. Outer corners - yes you can fold these around corners. I had 4 of these. two I just folded alone, one I used spray adhesive, and another I used lots of spray adhesive! So a common area is the window recess area. a 90 degree bend. The first couple I just peeled and stuck around the corner, but the following day I noticed some minor bubbling right on the edge. I was able to drip some spray adhesive down the gap though. As with the glue instructions, spray it or drip it in a bubble gap and allow to go tacky for a 2-4 minutes before pushing down.... I did have one that persistently kept bubbling and I can only presume that I didn't prepare the area good enough.... NOTE - be careful if you rub hard to get a good clean 'fold' on the corner as you can split the vinyl if done too much... It will take some doing to actually crack though, so you can be quite forceful. Inner corners - again, I had 4 of these. much similar to the outer but you just need to be aware of the remaining tile (the bit going around the corner) Don't peel the protective backing off more than needed as they will grab any surface you accidently touch whilst trying to get a good push in the corner. As an example, if I had a whole tile needing to go around a corner, I would stick the nearest edge up to the corner - that way the tile is bonded and wont move. I then used my finger tips to push into the corner (hard). I then used a block of wood to get a good even and solid push into the corner, before removing the backing off the second half... NOTE - If your walls are not true, just remember that when you go around the corner, the tile may end up with the tile level changing and having a slight slope up or down. So, if your walls are waaaaaay out , I would recommend cutting into a corner. I did mess up in the beginning and started in the wrong corner. This led to coincidentally one of the tiles finishing in a corner.... However, as these tiles are staggered on every row, it meant that I had to fold some of the rows from the next tile around the corner. I was a bit worried that having only approx. 5 cm going around the corner would not be enough to hold it in perpetuity.... This corner was also waaaay out of alignment. It is a mainly hidden corner, so rather than removing a row of about 5 tiles (£15 worth), I actually folded the other tile around the corner and over lapped the other tile by about 10cm, laying one tile on top of the other..... If you can align them well, it doesn't overly show, and sticking these tiles on top of each other is probably the best surface to stick to! This gave me a stronger corner bond which won't be seen anyway and saved removing a whole row...... a learning curve tbh.... I wouldn't ordinarily do this type of thing but as it was out of sight, it didn't matter. Once you have done the tiling (if that's what you can call it)..... I used a tea towel and rubbed over the tiles every day for a couple of days to assist any air bubbling that may have occurred. You could use spray adhesive (carpet glue).... I bought 8 cans thinking that I would spray them all, but didn't need 7 of them as I put a lot of work into the prep. These are extremely grab sticky if the surface is perfect! My final observation/tip - I have OCD.... and when you are up close and personal cutting and sticking these to the wall, you can see every blemish, misalignment, bump bla bla..... (I am being extremely critical of minor issues.....my self-adhesive tiling is not that bad!!!) If you are thinking it is not perfect - step back and look at it. No one is going to be checking your tiles with a spirit level or magnifying glass, and you would have to be some sort of tiling genius to get perfect 'real' tiles, so some imperfections can actually enhance the look. Removing these tiles because it is not quite right is a 70/30 pot luck (depending on the backing surface as to whether the tile comes off clean enough to re-use, or if it has taken any paint or plaster with it..... so think twice before taking off. If you need to remove the tiles, a good way (even if used spray adhesive) is to warm the tiles up using a hair dryer, or steam wallpaper stripper, or if careful - a heated paint stripper. It will leave a residue, but should leave the walls intact! You can drill these. I would suggest that you use a wood/universal drill first (through the tile bit) if going into concrete. Once you have created a hole, then swap to a masonry drill. Just remember, these are essentially stickers, so if you are needing a hole near an edge of a tile, be careful as there is a chance you could snag the tile and pull it if you are using a blunt or slow speed drill. These are water resistant. You can wipe them down with a damp cloth and even spray with a bit of anti bac....... but they are not waterproof to the degree that putting them around a hot steamy shower will stop them peeling off. Invariably, at some point, they are likely to peel. Yes they will look great for a while , but if you want these to last (which they can) then don't put in wet areas. One final comment - every tile is 100% accurate and symmetrical to the next one in every way.... I noticed a darker area on one of my join areas which was annoying, and got me muttering about poor quality tiles..... then I noticed that a small bit of the FRONT protective film had not come off when I originally removed it. Luckily I noticed before ripping the tile off... Oh one more final comment - I can't reiterate enough - don't use this behind a hob.... It's dangerous! Yes, it will look lovely, but even if the kitchen doesn't catch fire at some point, invariably you are likely to ruin the tiles over time with the likes of fat splashing up on them etc.... buy a proper splashback for a hob. Hope that has helped answer some of the questions you have, like I did before deciding to buy these.
Trustpilot
3 weeks ago
1 week ago