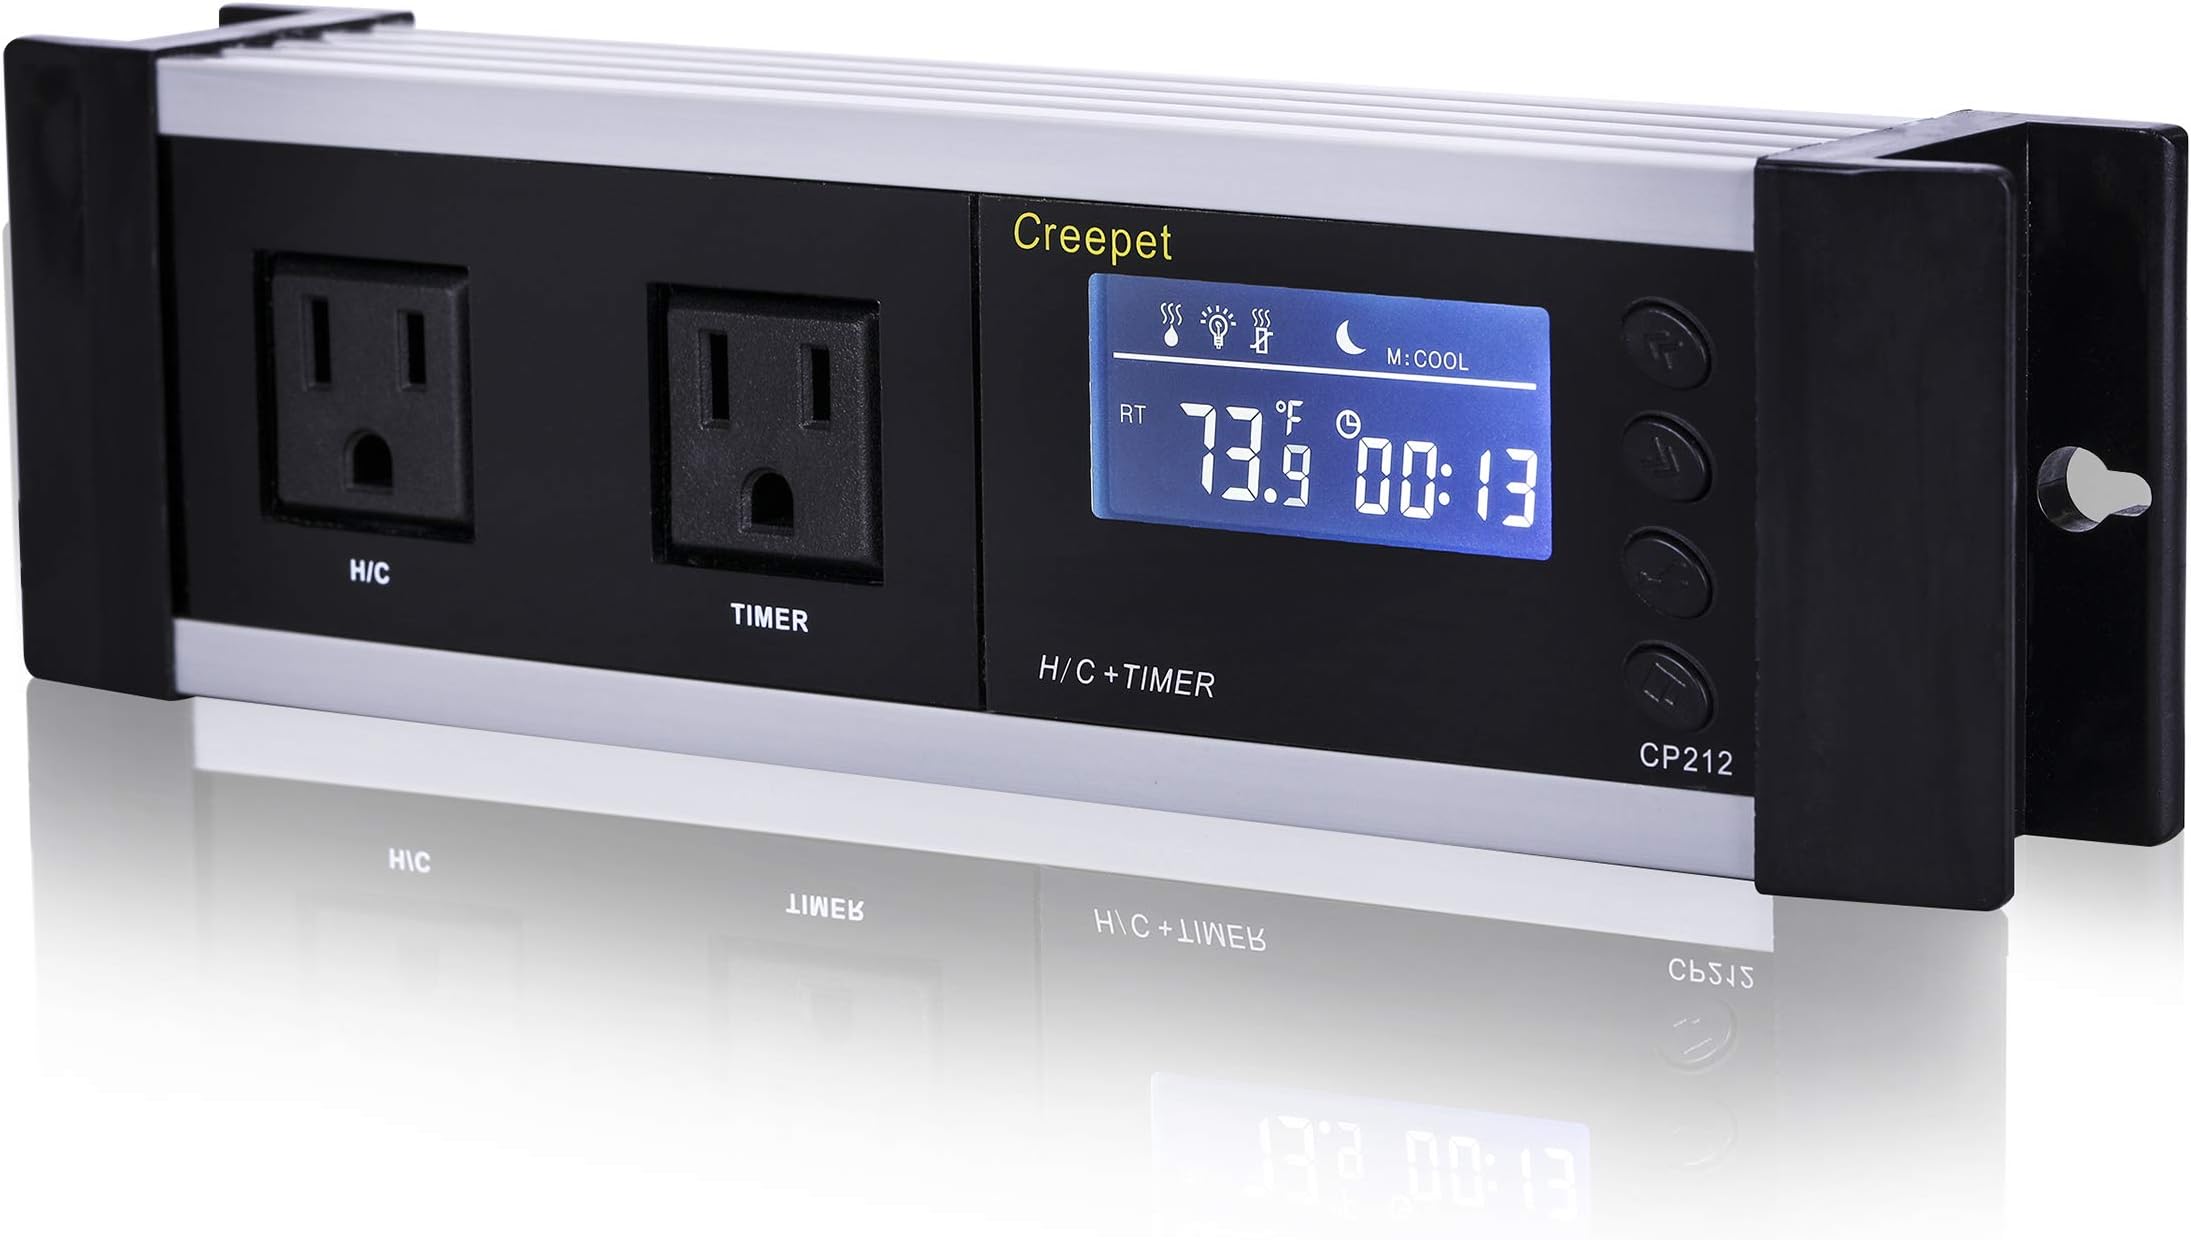
First of all, I'm not a stupid person and I have experience with various reptile thermostats, including JumpStart and Herpstats 2 and 4. So I figured I could decipher how to set up the Creepet unit without too much trouble. After wasting a full hour of my life..not so much. This thermostat may work perfectly. I don't know, because I'm still not certain I've set it correctly. ****CONFUSION**** ~I don't know what moron decided that the thermostat settings should time out after 15 seconds (unlike HerpStat's 3 minutes) but it makes setting it up a nightmare. ~The setup does not go in a logical order; for example, you would expect the clock to be the first setting, but it's thrown into the middle of the setup process. ~You must scroll through all settings to reach the setting what you want. For example, if I wanted to only change the Temperature Alarm, I would need to scroll through several other settings first to reach it. (This isn't so different from the HerpStat 2, but it IS annoying when it times out every 15 seconds). ~Ignore the clock when you first plug in the unit. Until you set the time, it shows how long the unit has been on. This is useless and bizarre. ****MY INSTRUCTIONS**** In an effort to better help others who purchase the Creepet, I've done my best to write out instructions in proper English. That said, there are one or two settings that are still a mystery to me. If you happen to know what they mean, by all means please leave a comment and I'll update my review. (BUTTONS 1 & 2) -- up << and down >> arrows that allow you to alter settings. Pressing these buttons while not in SET mode will simply scroll through the current settings in a loop. (BUTTON 3) -- looks like a hand gripping a hammer. This is the SET button. (BUTTON 4) -- looks like a floppy disk. This is the EXIT button. [ STEP 1: SETTING HEAT VS. COOL MODE ] Hold the SET button (BUTTON 3) for three seconds to enter SET mode. The letter "M" will flash in the upper toolbar. Use the >> or << arrows (BUTTONS 1 and 2) to select either HEAT or COOL mode. [ STEP 2: SETTING DAY TEMPERATURE ] While HEAT VS. COOL Mode is still flashing, hit the SET button once. Do not hold it; if you do, it does nothing and will time out. Just press it once. This enters DAY MODE, and the sun icon and temperature will begin to flash. Use the >> or << arrows to select your preferred daytime temperature. [ STEP 3: SETTING NIGHT TEMPERATURE ] While Day Temperature Mode is still flashing, hit the SET button once. This enters NIGHT MODE, and the moon icon and temperature will begin to flash. Use the >> or << arrows to select your preferred nighttime temperature. [ STEP 4: TEMPERATURE DIFFERENCE "DL" MODE ] While Night Temperature Mode is still flashing, hit the SET button once. This enters DL (aka TEMPERATURE DIFFERENCE) MODE. I believe this essentially allows for the unit to recognize an acceptable temperature range; but I'm unsure of how this differs from the Over-Temperature Alarm Mode (below). [ STEP 5: OVER-TEMPERATURE ALARM MODE ] While DL Mode is still flashing, hit the SET button once. This enters OVER-TEMPERATURE ALARM MODE. An icon in the top menu that looks like a coffee cup with steam will begin to flash. This allows the unit to recognize "dangerous" temperature rises and drops; for example, if your temperature is set to 80°F and you set your alarm number to 10°F, the machine will trigger a buzzer alarm at either 70°F or 90°F. Use the >> or << arrows to select your preferred range number. [ STEP 6: DAYTIME/NIGHTTIME TEMPERATURE CLOCK (aka L1) MODE ] While Over-Temperature Alarm Mode is still flashing, hit the SET button once. This enters DAYTIME/NIGHTTIME TEMPERATURE CLOCK (aka L1) MODE. The letters "L1" will flash to the right of the clock. Use the >> or << arrows to select the start time (hour); hit SET again and use the >> or << arrows to select the end time. This will determine at what time your daytime heat setting kicks on and at what time your nightime heat kicks on. [ STEP 7: WHO THE F*** KNOWS (aka L2) MODE ] While L1 CLOCK Mode is still flashing, hit the SET button once. This enters L2 MODE. The letters "L2" will flash to the right of the clock. I have no freaking idea what this is. It's connected to DL Mode, and you can use the arrows to set a time range (just like in the step above). If anyone can contribute, please let me know. [ STEP 8: CLOCK MODE ] While L2 Mode is still flashing, hit the SET button once. This enters CLOCK MODE. The clock icon will flash to the right of the clock. Use the >> or << arrows to select the start time (hour); hit SET again and use the >> or << arrows to select the end time. This is setting the *actual time*. When my unit arrived, it must have been internally set to an evening time (the moon was flashing) but when I set the correct time, it switched to the sun. [ STEP 9: LIGHT TIMER MODE ] While Clock Mode is still flashing, hit the SET button once. This enters LIGHT TIMER MODE. Use the >> or << arrows to select the start time (hour); hit SET again and use the >> or << arrows to select the end time. This sets the lamp start and end time. Watch for the sun vs. moon icon to flash, indicating day/night. That's as far as I got. I also could not figure out what "AL" meant when scrolling through the settings. Hopefully a little experimenting will help to clarify. This could be a great, affordable alternative to HerpStat (though I trust the reliability of the HerpStat MUCH more than this unit) but the manufacturer MUST make either a clear user guide or an online video setup tutorial or it's pretty much useless.