
DOWNLOAD THE APP


Customer Services
Copyright © 2025 Desertcart Holdings Limited
DOWNLOAD THE APP


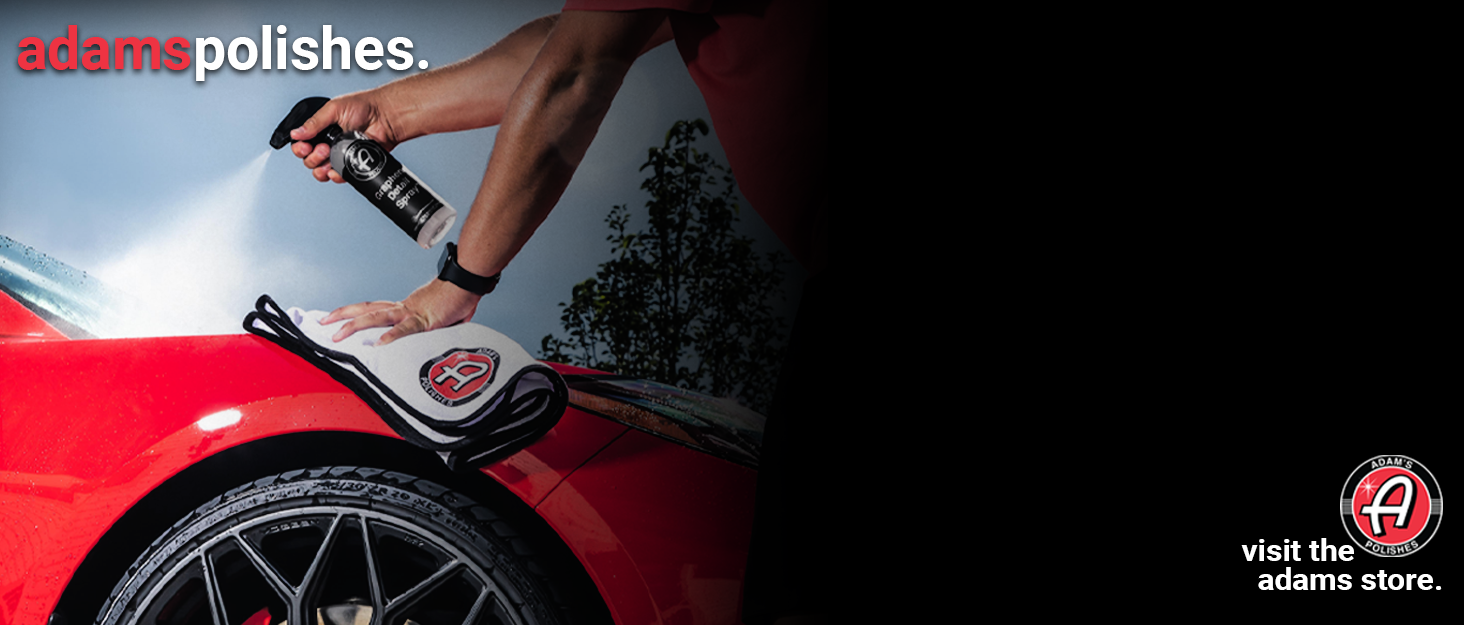
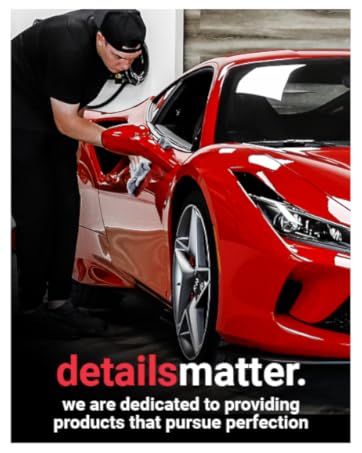
✨ Elevate your car’s glow & guard with graphene power — because your ride deserves the future today!
Adam's Advanced Graphene Ceramic Coating delivers a cutting-edge 10H hardness nano-ceramic barrier with patented UV tracing technology for perfect application. Engineered for over 9 years of protection, it offers extreme hydrophobicity and enhanced gloss with 50% more resin, safeguarding paint, glass, wheels, and trim from scratches, UV damage, and contaminants. This versatile, professional-grade coating is easy to apply and designed to keep your vehicle looking showroom-new with minimal upkeep.


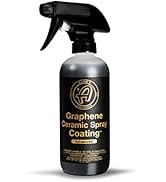

| ASIN | B099SFV2MB |
| Batteries Required? | No |
| Batteries included? | No |
| Colour | Black |
| Customer Reviews | 4.6 4.6 out of 5 stars (420) |
| Date First Available | 15 July 2021 |
| Grit Number | 180 |
| Item Package Quantity | 1 |
| Item Weight | 118 g |
| Manufacturer | Adam's Polishes |
| Manufacturer reference | NO-FLASH |
| Material | Ceramic |
| Package Dimensions | 22.4 x 21.89 x 10.9 cm; 117.93 g |
| Part number | NO-FLASH |
| Size | Advanced Kit |
A**W
I was always scared to try ceramic because of how difficult it can be to mess up. I gotta say this was not difficult. Labor intensive? Very. Difficult? No. This is a solid weekend project. My flow was wash>iron removal>synthetic clay>polish>strip wash>surface prep>ceramic. I had already done a two stage correction when I got it, but since then I've only used waxes and sealants. The polishing brought it back and got out all the new swirls. As far as the graphene, I watched the Adam's livestream of how to use their advanced graphene and it taught me a lot. I applied it, waited for the rainbow to dissipate, and waited for it to sweat. Then I used the suede towel, which felt grabby on the surface as they described in the video to level it out. Then I used the white towel to buff it off. The coating itself only took about 3 hours to do the painted surfaces. I applied in a crosshatch pattern in smaller sections along the body lines to ensure it wasn't sitting for too short or too long, because my environment was uncomfortably hot and humid which decreased the cure time. The UV part was pretty useless on my car. Maybe more helpful on a lighter shade. Ignoring the prep, I give the actual application of the product a 7/10 on the easiness scale. It really wasn't hard. It definitely gives the car a very high gloss. It is incredibly shiny. It's not deep like a carnauba wax though. If you're willing to give up the better part of a weekend, you can have a coating that will last years and save thousands DIYing it. It should be noted that per their videos, you can use this stuff on many things. Any exterior surface of the car, glass cook tops, shower doors... You name it. I used exactly one bottle on an Audi Q7 and S5, covering both exteriors completely minus the wheels. Keep in mind that the applicators and towels are one time use. They'll get crusty when the ceramic dries. So if you wanna do multiple coats or different things on different days, have some extra applicators and towels ready. Also, once you open the bottle it will start curing, so close it in between panels and use it promptly. Update: Washed it for the first time and the hydrophobicity is amazing. I completely dried the car towel free with only a small battery powered blower, the kind you would use to blow sawdust off a workbench or something. If I had a real leaf blower I could probably dry this thing in less than a minute. 3 month update: Hydrophobicity is minimally degraded. I'll use a synthetic clay mitt to bring it back. Car still easily dries with a blower. Also want to add you may find some information on the internet saying you don't need to level the coating on plastic, like the gray stuff on bumpers. You absolutely must level and remove the coating just like on paint or glass or you will get white streaks that are essentially impossible to remove. I used it on the plastic rockers on the S5 and the entire grille of the Q7, which has a ton of gray plastic. I thoroughly cleaned and surface prepped, and then applied the ceramic in the same manner as the rest of the car, although deciding when to level and remove it is a guessing game because it won't rainbow or sweat. It deepened the color and restored it to how it looked new. No more chalky, oxidized plastic trim! One year update: This stuff is still going strong. Water beading is still outstanding, I can still dry the car completely with a leaf blower, and the shine is immaculate. I have not touched up the coating at all except for a handful of applications of Adam's graphene detail spray. I never used a clay mitt on it as I said I would, and apparently that's not good for the coating anyway so I'm glad I didn't. Thoroughly impressed with how it has held up after a year. I would not hesitate to use this again, but apparently I don't need to. I went ahead and finally did my brake calipers and wheels, and wow. The brake dust just rinses right off. It's amazing. I really don't even need to touch them.
A**.
I was impressed with the kit and with the results. I will admit being a bit worried about applying a "permanent" coating, mostly that I'd somehow screw it up. However, it's more forgiving than I was fearing. The kit had the ceramic/graphene coating, some suede-like polishing cloths, two delightfully fluffy detailing towels, two suede-like applicator sponges, and two very cute small spray bottles of surface prep and "graphene boost". I applied this to a 1997 BMW Z3 convertible which has mostly lived a charmed life indoors and out of harm's way. Nevertheless, it had some water spotting and paint imperfections which I "mostly" resolved with a little polishing compound and a clay bar. I was not about to let perfection be the enemy of good here. The surface prep spray really did a great job of removing the last little bits of stuff that I missed in my prep, and then the application of the graphene ceramic coating went remarkably smoothly. I applied a bit, moved it around, buffed it off, and ... nothing screwy happened. It looks great. Shiny as all get out. And slick to the touch. The next day I put it outside and set about some other anal-retentive cleaning tasks, and noticed that some overspray from putting 303 on the tires just fell clean off the paint. I'm going to spray this thing with water tomorrow just to see how aggressively it beads up - I might even add a photo. All in all this was a great kit, and it wasn't as scary as I was fearing. Highly recommended. But I'm not sure I have the patience to do this to my minivan.
C**S
Use in a low humidity or conditioned space to help avoid bad results
N**O
A great package right here. Used for my bike and happy with results
L**G
I have been using Adam’s Polishes products for the past seven years and have applied the Advanced Graphene Ceramic Coating several times on different vehicles. This was the first time I didn’t have to correct any high spots, which I attribute to using multiple microfiber towels to gently buff away any remaining product. For this application, I performed a light paint correction on my 2025 Tahoe, which had been previously treated with Adam’s Graphene Spray Coating about 10 months ago when I first purchased it. After polishing, I wiped the surface down with the included surface prep and then applied the Graphene Ceramic Coating. Once the coating flashed, I buffed it first with the included suede towel, followed by the provided white microfiber towel. Preparation and Application Steps: 1. Strip wash using an electric pressure washer 2. Clay mitt and clay bar treatment with detail spray 3. Paint correction and polish 4. Surface prep wipe-down 5. Ceramic coating application The results are outstanding — my black Tahoe now has an incredible shine. Water beads and slides right off the surface, and removing bugs or droppings is effortless. Highly recommend.
Trustpilot
2 weeks ago
5 days ago